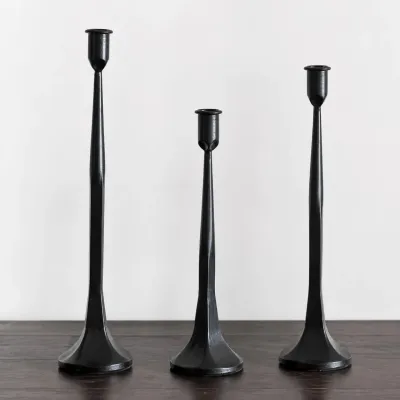
AIM brings adjustable cables, directional placement and dimmable light into one clear, sculptural presence – as a single accent or a composition of up to five heads.
Aluminium + acrylicBlack / White1–5 heads
The idea
A point of light, many viewpoints.
The body stays quiet while the direction can change. Place each head where light is needed – above the table, beside the chair, or by the bed.
AIM / 01
01 / In detail
Clarity begins with a line.
Three small decisions carry the whole form: a quiet ceiling plate, a precise connection and a light point that can be redirected within the room.
Ceiling plateThe calm beginning of the composition.
ConnectionCable and body meet with a clean transition.
Light sourceAn LED chip for focused illumination.
AIM / 02
Line
The first trace: light considered as movement.
02 / The idea
From thought to room.
The form grows from the relationship between light, line and distance. The sketch is not decoration; it becomes a measure for the final composition.
Proportion
The form stays clear so the room can set the tone.
03 / Configuration
One. Two. Five.
The head count sets the room’s rhythm. 18 cm or 24.5 cm diameter. Black or White. A single point or a measured group.
Black / 1 headA quiet accent
Black / multiple headsGraphic rhythm
White / 1 headA lighter presence
White / multiple headsA bright composition
04 / In the room
Four rooms, four moods.
The same form can speak softly or with intent – depending on where it hangs and how many heads share the room.
Dining table
Focused light for long evenings.
Bedroom
A quiet point for the edge of night.
Workspace
Light beside the shoulder when focus matters.
Living room
As a group, light becomes sculpture.
05 / Scale
Material, measure, rhythm.
Aluminium and acrylic keep the form precise. Diameter, colour and head count decide how AIM is read in the room.
MaterialAluminium / acrylic
FinishBaked paint
Light sourceLED chip
Light controlDimmable
SizesØ 18 × H 15 cm Ø 24.5 × H 18 cm
Configuration1–5 heads · Black / White
06 / After dark
After dark, only direction remains.
Tune the atmosphere to the moment. For fitting guidance, open the “Installation Guide” tab above.
“Very harmonious overall look. Pleasant light and stylish appearance.”Michael S. · Verified review
4.9 / 5 · 27 reviews
Your composition starts with a point.
Choose diameter, colour and head count above the gallery. Availability and price are shown for the selected variant.
01Diameter02Colour03Head count
HOZO Installationsanleitung
Planen Sie Ihre Beleuchtung.
Raumweise Startwerte für Leuchtengröße, Montagehöhe, Abstand und Durchgangshöhe. Tippen Sie ein Kapitel an.
01
Esstisch
Größe und Mitte vom Tisch aus festlegen, dann die Sicht von jedem Sitz prüfen.
So messen
Tischlänge und -breite messen. Bei runden Tischen den Durchmesser nehmen.
Startbereich
Runde Leuchten: etwa 1/2 bis 2/3 der Tischbreite. Längliche Leuchten: 1/2 bis 2/3 der Tischlänge.
Platzierung
Die Leuchte über dem Tisch zentrieren, nicht zwingend über dem Raum.
Abstand
76–91 cm über der Tischplatte beginnen.
Bei langen Tischen wirken zwei kleinere Pendel oft natürlicher als eine übergroße Leuchte.
Vor dem Bohren
Eine Papierschablone an die Decke kleben und vom Türrahmen sowie sitzend prüfen.
MessenPlatte bis Unterkante
Hängehöhe76–91 cm
AusrichtenMitte des Tisches
02
Kücheninsel
Die nutzbare Insel messen und die Pendel auf der Mittellinie halten.
So messen
Nutzbare Länge und Breite der Insel messen.
Startbereich
Eine Linienleuchte: 1/2 bis 2/3 der Insel-Länge. Mehrere Pendel: erst den Durchmesser, dann die Anzahl wählen.
Platzierung
Pendelmitten gleichmäßig auf der Insel-Mittellinie.
Abstand
76–91 cm über der Arbeitsplatte. Äußere Pendel nicht an den Inselenden.
Die komplette Reihe mocken, nicht nur ein Pendel.
Vor dem Bohren
Drei Papierkreise über der Insel zeigen Abstandsprobleme schneller als ein einzelnes Muster.
MessenPlatte bis Unterkante
Hängehöhe76–91 cm
AusrichtenGleiche Mitten
03
Raummitte
Länge plus Breite ergibt den Startdurchmesser. Deckenhöhe und visuelle Schwere machen die Entscheidung fertig.
So messen
Raumlänge und -breite in Metern plus fertige Deckenhöhe.
Startbereich
Länge + Breite (m) × 8,3 ergibt einen üblichen Startdurchmesser in cm. Beispiel: 3,7 + 3,0 → ca. 56 cm.
Platzierung
Die architektonische Mitte nur nutzen, wenn sie vom Eingang und vom Möbelplan her Sinn ergibt.
Abstand
Mindestens 2,10 m lichte Höhe unter dem tiefsten Punkt im Laufbereich.